
Wednesday, August 15, 2012

Tuesday, August 14, 2012
Tasty Tuesdays ... Crockpot Lasagna
I made this Crockpot Lasagna the other day and it turned out quite yummy!
I ended up making it my own recipe because the recipe that I tried to follow had NO flavor!!
Ingredients I used ...
I really eyeball a lot so this is just what I used and did ...
- 1 pound beef (brown it before putting into the crockpot).
- About 8 uncooked lasagna noodles broken in half.
- 2 Large scoops of cottage cheese.
- 2 large scoops of ricotta cheese.
- 1 1/2 handfuls of shredded mozzarella cheese.
- 1 handful of shredded parmesan cheese.
- About 7 shakes of pepper from the pepper shaker.
- About 4 shakes of garlic and basil salt.
- About 4 shakes of dried minced onions.
- 1 Large can of tomato sauce, I think it was about 24 ounces.
- About a 1/2 jar of spaghetti sauce.
What I did ...
- I brown the beef.
- Drained the beef from the grease.
- Mixed the beef, tomato sauce, spaghetti sauce, garlic basil salt, pepper and minced onions in a bowl.
- Mixed the 2 scoops of ricotta cheese, 2 scoops of cottage cheese, 1 handful of mozzarella cheese and 1/2 handful of the parmesan cheese in a separate bowl.
- I put each thing in the crockpot in layers ... meat mixture, a few noodles & cheese mixture ... until the bowls and noodles were all in the crockpot.

- I put the lid on the crockpot and cooked it on low for 4 hours.
- Then I put the rest of the cheeses on top and kept it on warm for about 30 more minutes.
- Cooked some garlic bread and ate it up!
- We each had a large scooped serving and we have about 1 1/2 scoops left.
- YUM YUM YUM!

Come back tomorrow for Whatever Wednesdays!
Monday, August 13, 2012
Make It Mondays ... Easy DIY Screen Window
Hello everyone! I hope you had a great weekend!
Since the temperatures are finally starting to drop and we can open windows and doors for a few hours at night and in the mornings now, I think it's a good time to show you how to make your own Easy DIY Screen Window!

This was a large odd spot so this is why I had to make my own screen window.
The tools and items I used ...

My process was ...
(Sorry I don't have that many pictures of the process. I did this last year and forgot to take pictures)
- I measured the inside edge of the spot where I was going to put the screen window.
- Bought 2 pieces of wood that was the measurements that I needed which was 1/2 inch thick, 7 feet tall each, and about 1 1/2 inches wide.
- I brought home the wood and remeasured the window, measured and marked the wood where I needed to cut it.
- After cutting the wood with a hand saw, I stapled all the corner areas together with my favorite tool ... my staple gun!
- Then I rolled out the mesh screen on top of the frame I just made with the wood and cut it with regular scissors, leaving about a 1/2 inch laying on top of the wood on all sides.
- I worked one side at a time and stapled the screen down tightly to the wood.
- Then I took out the window, put the screen window in and put the window back in and voila screen window for under $20.00.


Then I put 2 cat perch window beds up and had a cat party!
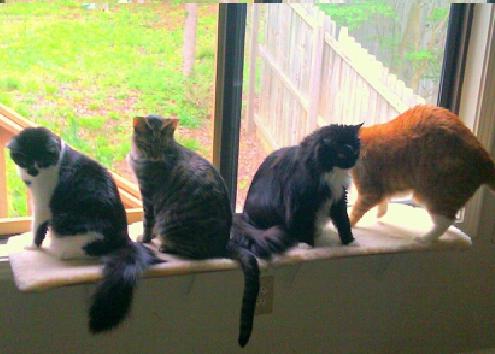
Hope to see you back here tomorrow for Tasty Tuesdays!
Thursday, August 9, 2012
Furry Fridays ... Meet the reason I made a shelter box


Have a wonderful weekend and come back for Silly Sundays!
I may not be able to post Silly Sundays this week. I will be away from my blog until Monday August, 13th.
I may not be able to post Silly Sundays this week. I will be away from my blog until Monday August, 13th.

Tips & Tricks Thursdays ... Baking Soda & Vinegar

I'll be posting the Furry Fridays today too because I will be away from my blog until Monday August, 13th.
Wednesday, August 8, 2012
Whatever Wednesdays ... RCB Fashion
http://www.rcbfashion.com/


Tuesday, August 7, 2012
Tasty Tuesdays ... Spinach Feta Turkey Burgers
Hello everyone ...
I made these Spinach Feta Turkey Burgers last night and they were quite yummy!
And aren't really too bad for you!!
One thing I accidentally did different was that I was suppose to use frozen spinach but I just got a thing of regular leaf baby spinach ... but all was OK, it was still yummy!!
Ingredients I used ...
1 cup oatmeal oats
I used about 5oz of fresh leafy baby spinach
2 large egg whites
6oz. of crumbled feta cheese. I just went for the traditional flavor.
1 pound of lean turkey meat

Then I mixed everything up with my hands in a bowl.

I made 8 burger patties, about the size of a normal doughnut.

Since I only have a small George Foreman I could only cook 2 patties at a time but it didn't take too long.


We put these babies on a sesame seed bun and ate them on up! The extras I wrapped in foil and put in the freezer.
Enjoys!!!
Come back tomorrow for Whatever Wednesdays!
Monday, August 6, 2012
Make It Mondays ... Shelter for my outdoor loves
Hello there -
I have about 4 feral cats that like to come play in my backyard so I have been working with them to gain their trust by feeding them and giving them fresh water everyday. I can get pretty close to them but they still don't want to be touched. It's a long process but will be worth it in the end. Once they trust me I will get them fixed and release them back into our yard to live as they like to!
So I decided to make my 1st Shelter Box here is what I did ...
- First I went to Home Depot and bought some plywood.
- I measured out the wood to the sizes I wanted the box top, bottom and sides to be.
- Since I am clumsy I decided again that it would be safest to have my husband use the circular saw to cut the wood up.
- My husband had a 1" x 1" piece of wood and decided for corner support inside to cut it into 4 pieces.

Then I got my wood glue, staple gun extra staples and put the box together. I glued and stapled like a mad woman!


Then I used an Weather Protection Sealant that my husband had bought previously from Home Depot and brushed that generously all over the box. Inside, outside, top, bottom and sides. I let that dry over night.
The next day I painted the outside of the box all white with a normal can of paint you can get anywhere that sells paint.

After the white was all dry, I painted it yellow and decided to paint some silly fun little pictures all over the box.
Here's the front

Here are the sides

Back

Then I put the top on! You could add hinges to the top to open and close but I just set mine on top because I was excited to put it outside!
Here is my cat, Arthur (aka Arf) telling Daniel to go inside the box!

And that there is the end for today's Make It Mondays post!
Come back tomorrow for Tasty Tuesdays!!
Subscribe to:
Posts (Atom)